
Matching was always one of my favorite games when I was young. I could play it for hours. As a classroom teacher, I used to love to incorporate games and play into my classroom. I have always been a subscriber to the Dr. Suess philosophy that "Fun is good" and that learning should be fun. But one thing I never liked was storing (and cutting out or the mess left after middle school students cut out) paper matching cards. I shied away from some of these activities because as a roving cart teacher the time to clean up after the class was over was too much when adding in the travel time in the hallway.
The other day I saw this great activity and wished I had it when I was a classroom teacher, I would have used it and other game tools all the time! So here it is, making a memory game using Google Slides!

1. Open up a new slide document. This will be where we make the template, then we will make a copy of just the final slide to share with students or use on an interactive whiteboard.
2. I found it easiest to work with a blank white background, but feel free to pick any background you would like.
3. Go to the Insert Shape button and select rounded squares (I like this because it looks the most like the matching tiles I played when I was a kid!) You can make the backgrounds any color you would like, I went with a neutral grey to make it easy to distinguish the card from the background and added a colored border.
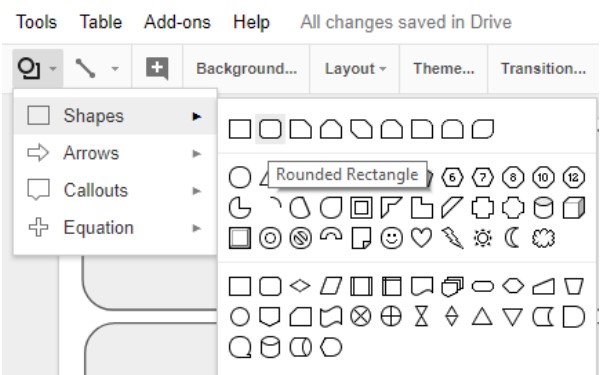
4. Select the shape once you are happy with it and copy it. Paste the shape and arrange it where you would like it. Once you do all of the boxes in a row/column, select the whole column and then copy and paste it to save time!
5. Once you have all the rows set up the way you would like them, you can use the arrange drop down and select distribute to make sure all the boxes are evenly spaced on the board.

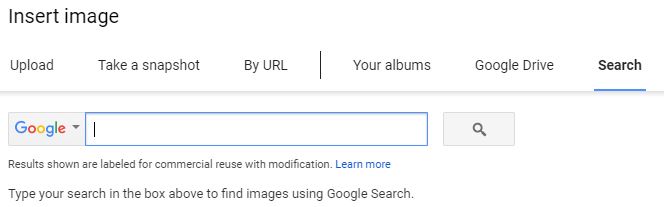
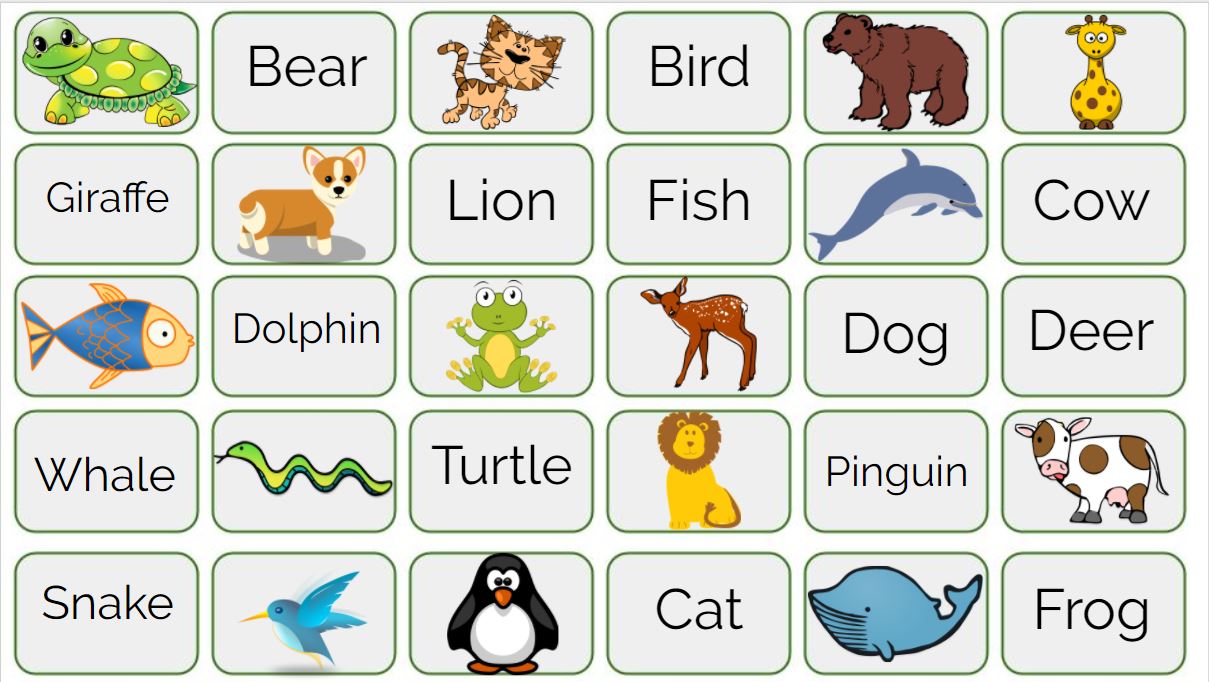
6. Add images/text to your matching. This could be anything you would like students to match up. Use the Insert Image option and search for fair use images right in Google Slides!
7. Once you have all your images/text in the boxes, we need to download the slide to prevent the images from moving around while students are playing the game. Select File and then Download as and .jpg. This will download just this current slide as an image file.

(Pro Tip: Download the base game without the images/text added, then you can set that as the background and add any vocab anytime you want to reuse it. You will still want to download the card slide after adding each new set of for ease of play.)
8. Once you have the image file on your computer, go back into your slides and insert a new blank slide. The name of the file will be the name of Slide deck.
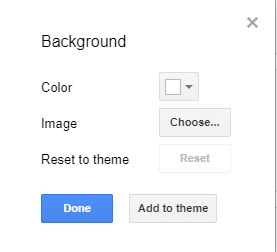
9. Click on Background in the center of the toolbar. 
Then click “choose” next to Image to select the image you just downloaded from your computer. This will set the matching game you just built as the background image on the slide so when the “front” of the cards is clicked, the back stays put.
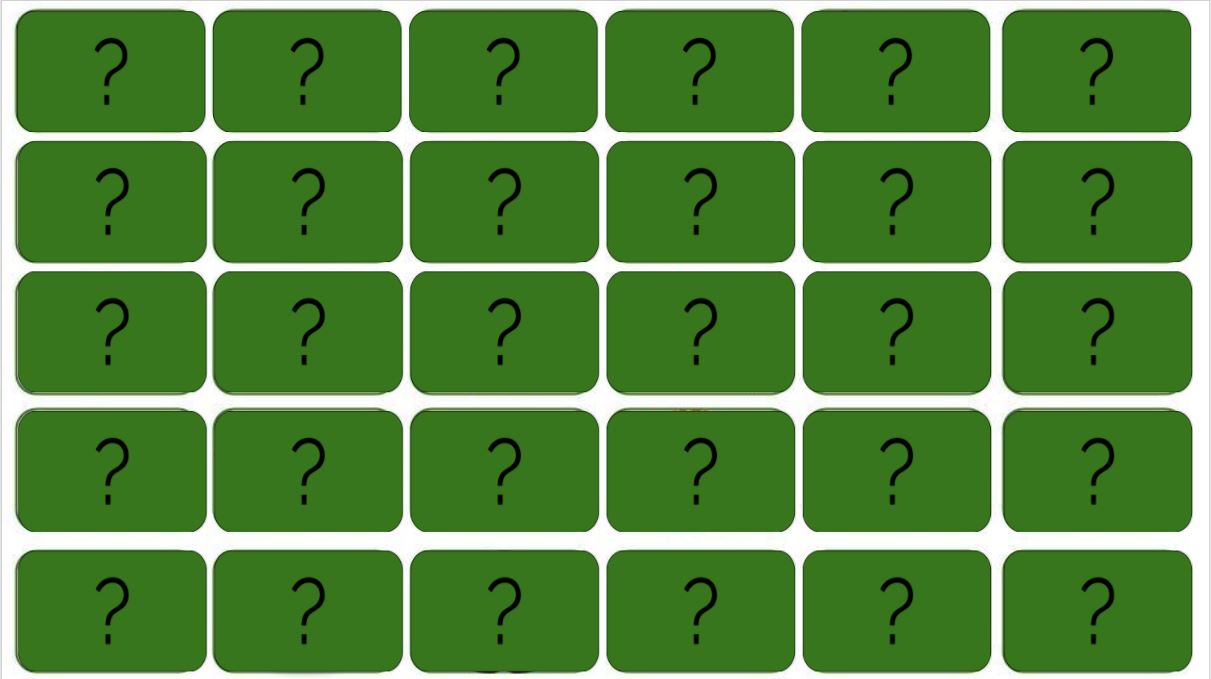
10. Make more boxes and place them over the background. I made mine a darker color and added a question mark. This can also be done in Google Drawings and inserted as an image over the background cards. (Or use the link here).
11. Copy the boxes/images of the back over all the cards.
12. Distribute the cards and make sure students make a copy. This will make it so students can play the game.
13. The rules for play are listed below.

Most importantly, have fun!
Links to the existing files
Comments
Post a Comment